Working with Postgres - Code First

In .NET, there are two ways of creating a database. One is to write codes based on the data created which is called, Data first, and the other is, of course, to create data based on codes written, Code first. Among the many options we can choose, we will see how we can link and use Postgres DB using the code-first approach in this writing.
List of Contents
Creating .NET Wep-API
How to create .NET web-API
Setting up development tools When working with .NET, we need tools to create a web application. We can download them at the link below. .NET | Free. Cross-platform. Open Source. (microsoft.com) .NET | Free. Cross-platform. Open Source. .NET is a developer
jin-co.tistory.com
Postgres Set Up
We need a server to run the DB and we will set up Docker for that purpose.
Docker Installation
Docker - Installation
To run your application globally, there are many things we have to set up from matching versions between each environment and configurations. Docket is a tool that allows us to manage the application in a container with all the necessary configurations. Do
jin-co.tistory.com
Docker Configuration
We need a configuration to create a database in the Docker. Download the .yml file below and save it to the root of your project folder.
※ Be mindful of the indentation, as it tells the scope based on the indentation like Python (Code language).
services:
  db:
    image: postgres
    environment:
      POSTGRES_PASSWORD: secret
      POSTGRES_USER: root
    ports:
      - 5432:5432
    volumes:
      - postgres-data:/data

volumes:
  postgres-data:
Open docker desktop

Run the command below in your project console.
docker-compose up
Connection Test
Run the database we just create on the Docker desktop

Install the extensions to work with the database

When it is installed, you will see an elephant icon. Click the icon and select the Plus icon

Enter the hostname

Type in the user name you used in the docker-compose (Same for the password and port)

Then the password

And the port

Choose a type of connection

Select the database to show

Then the database will appear in the panel.

Connecting the DB to the Application
1. Creating Entities
The entities are class files that are similar to a model. It represents a table in the database and each property in the entity represents a field in the database.
Open the project and create a folder to hold entities

Add a C# class file to it

Add properties

2. Installing Packages
We need packages to create a database and do the migration. Open the Nuget gallery
NuGet: Open NuGet Gallery
▶ Packages to Install
Note that the version of the packages must match that of the .NET. For example, if you are using .NET 7, you should install packages that start with version 7.
Npgsql.EntityFrameworkCore.PostgreSQLThis package allows us to work with Postgres. Check the box and click Install.

Microsoft.EntityFrameworkCore.DesignThis package is for converting code to a database when migrating. Check the box and click Install.

Lastly, install the package below for migrations
dotnet-ef
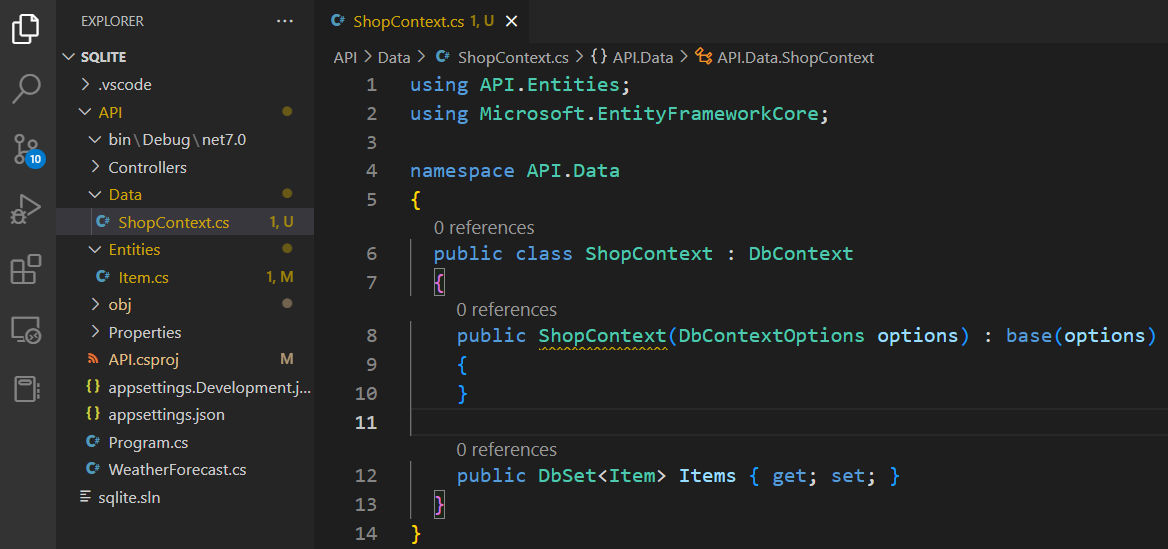
3. Adding Db Context
Create a folder to hold the context file

Add a C# class file

Inherit from the 'DbContext'
using Microsoft.EntityFrameworkCore;
Add a Constructor and add entities as a property with the entity class used as a type for the Dbset
using API.Entities;
using Microsoft.EntityFrameworkCore;

namespace API.Data
{
  public class ShopContext : DbContext
  {
    public ShopContext(DbContextOptions options) : base(options)
    {
    }

    public DbSet<Item> Items { get; set; }
  }
}
It is better practice to use environment variables than hard-coded values.

Open appsettings file and add the connection string as an environment variable. The values for each configuration must be identical to the ones you used in the 'docker-compose' file.
"Server=localhost; Port=5432; User Id=root; Password=secret; Database=commerce"{
"Logging": {
"LogLevel": {
"Default": "Information",
"Microsoft.AspNetCore": "Warning"
}
},
"ConnectionStrings": {
"Default": "Server=localhost; Port=5432; User Id=root; Password=secret; Database=commerce"
}
}
4. Registering Db Context as a Service
Program.cs file is a file that we use to add services and middleware. Open it and add the context as a service with an option to connect to the Postgres database.
builder.Services.AddDbContext<ShopContext>(opt =>
{
  opt.UseNpgsql(builder.Configuration.GetConnectionString("Default"));
});
5. Migrations
※ You can check the available commands using the command below
dotnet ef migrationsMove to the API folder and Run the command below to migrate (Stop the application it is running)
dotnet ef migrations add <MigrationName> -o <path>

When it is successful

You will see three files created

※ Among the three files, Designer.cs and Snapshot.cs are for backups, and major codes regarding creating data are inside the <migrationName>.cs
※ 한 가지 주의할 점은 마이그레이션 폴더 생성 시 Migration이라고 짓게 되면 마이그레이션이 상속받는 부모 클래스 'MIgration'과 중복되어 에러가 발생합니다.

※ When you have many project folders. It is more efficient to run the command in the root level.
dotnet ef migrations add <MigrationName> -p Infrastructure/ -s API/ -o <Path>
6. Creating Database
After the migration, we can create databases. it only has two commands, drop and update
dotnet ef database update

※ When you error like this, check the connection string

※ When you have many project folders. It is more efficient to run the command at the root level.
dotnet ef database update -p Infrastructure/ -s API/
※ Auto Migration and Data Seed
Auto database creation and seeding
When you download a .NET application for the first time and try to run the project, you might face a problem running the project if you don't seed the data first. Entity Framework provides an easy way to create a database when setting up the project after
jin-co.tistory.com
7. Checking Database
Open the Postgres extension and refresh

If you see the tables added, it went well

In this writing, we have seen how we can connect Postgres to the .NET application using the code-first approach.
